Welcome to part 6 of the Beer Locker series
In our previous article we explored implementing Digest authentication in place of Basic. This article will now delve into implementing username and password authentication using the passport-local module.
There is a new set of code this article will start from rather than where we left off in the previous article. The previous article required us to remove our password hashing which we don’t have to do for username/password. You can find the starting point of code here on GitHub.
The only difference here is that we added back password hashing and verification along with using Basic instead of Digest for our authentication. The Digest strategy implementation is still there but isn’t being used.
Username and Password
One of the most widely used authentication mechanism on the web is via a username and password submitted in a POST request or in the query string.
This authentication mechansim can be used for APIs but it requires submitting the credentials on each call. You could implement session state for your API but it technically goes against REST being stateless. By session state, I mean making a direct login type call with the username and password and getting back some form of session id. This session id can then be transmitted on each API call to allow the server to verify the authenticated user.
Update our Auth Controller
To get started with the passport-local module (Local) we need to install it using npm.
1
| |
The next thing we need to do is update our Auth Controller. Open controllers/auth.js and implement the Local strategy as follows.
1 2 3 4 5 6 7 8 9 10 11 12 13 14 15 16 17 18 19 20 21 22 23 24 25 26 27 28 29 30 | |
We have done 3 main things here.
First, we required the LocalStrategy provided by the passport-local module.
Second, we told Passport to use LocalStrategy. If you are paying close attention, you will notice that the strategy implementation for Local is the same as Basic. This is because we are essentially working with usernames and passwords for both strategies. The main difference here is that the Basic strategy is pulling the username and password out of the Authorization header. Local allows us to submit the username and password via POST data or within the query string.
Third, we updated isAuthenticated to use local instead of basic.
Test it using query strings
Yep, you heard me right. We are ready to test out this implementation.
The first way we can test out our new authentication is through the use of query strings. You are welecome to test this using any of the endpoints in our API. I am going to use http://localhost:3000/api/beers/.
Because we are using query strings, it is very simple to test this using a web browser.
Here is what I am using to test:
1
| |
If you implemented everything correctly, you should get back a list of beer for the authentication user.
Test it using POST data
The next test we can do is using POST data rather than query strings.
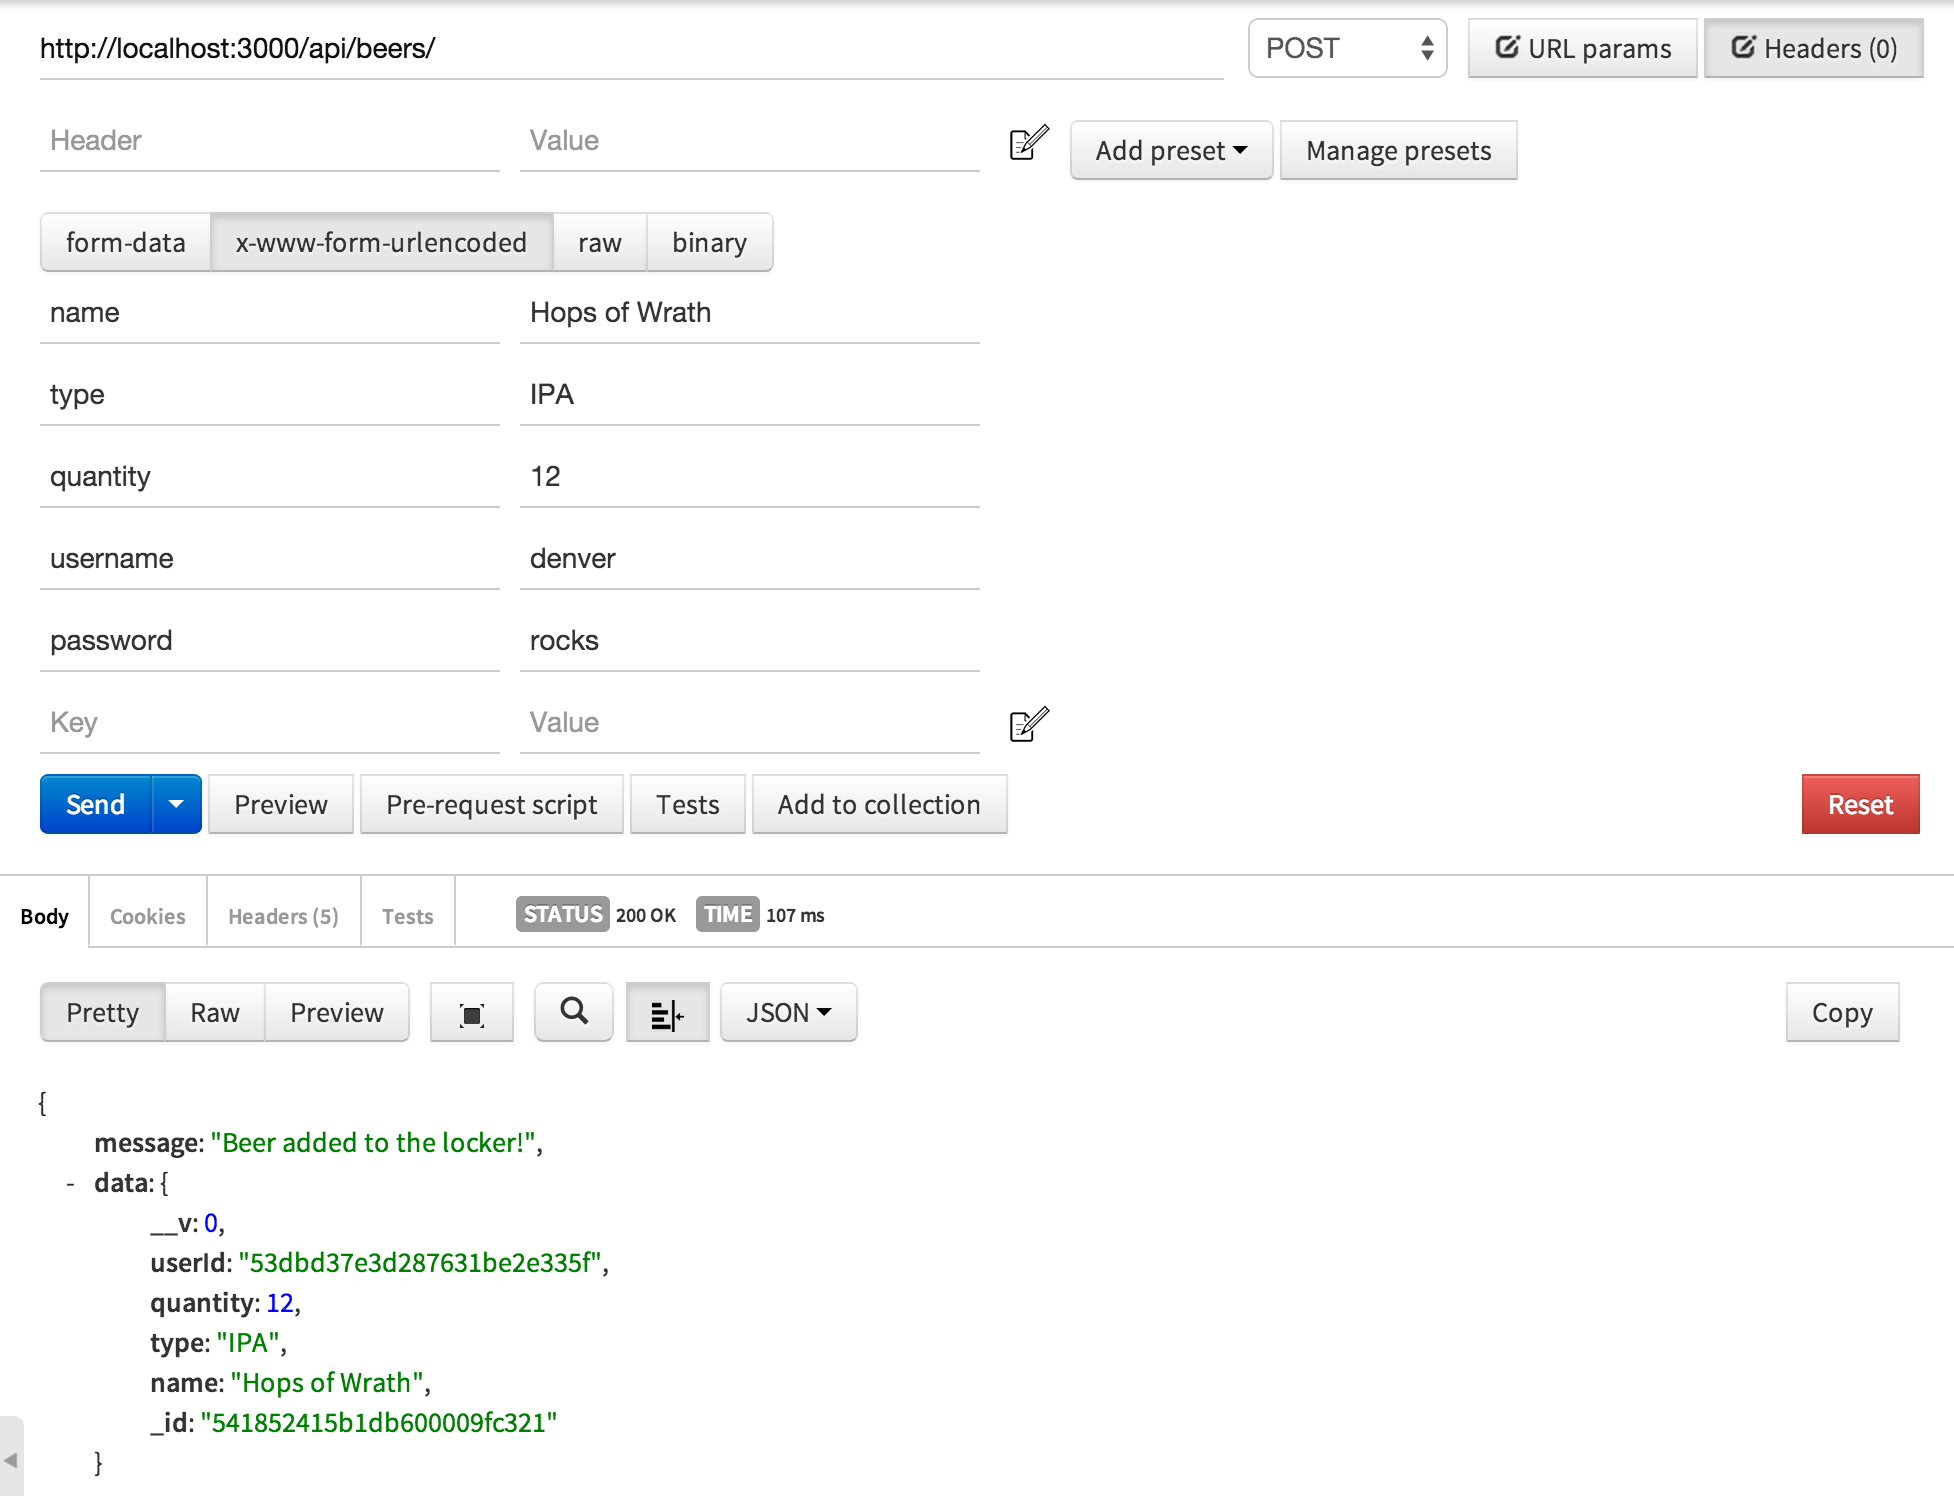
This is where things break down a little bit when you don’t have session state. In calls where we are POSTing, a username and password could be added. But we would be adding them along with other data we are submitting to in the POST. For exampe, when we are adding new beer to our locker, we would be posting beer name, type, and quantity. But we would also be posting a username and password. Also to note that this method only works for POST and PUT. We cannot submit data with GET or DELETE requests.
Here is an example where I am adding a new beer to my locker using Postman.
Customize our implementation
As noted before, the Local Strategy is looking to find the credentials in the body or query string parameters named ‘username’ and ‘password’. But what if you want to name them something else? You are in luck because you can configure it to specify the name to use for both username and password. This is done by passing in an options object when defining the LocalStrategy.
Open up controllers/auth.js and update it to look like this:
1 2 3 4 5 6 7 8 9 10 11 12 13 14 15 16 17 18 19 20 21 22 23 24 25 26 27 28 | |
What this does is tell the LocalStrategy to look for the named parameter ‘email’ for the username and ‘pass’ for the password.
Wrap up
You now have the tools needed to implement username and password authentication.
As stated before, this type of authentication may not make the most sense for a RESTful API. Of the two, query string makes more sense but it is still risky because you are sending the username and password within the URL. Even over an HTTPS connection, it makes it potentially more visible to someone ‘watching over your shoulder’, browser history, etc.
Hopefully this shows you how to use this strategy in other situations such as a web UI with a login form.
I have a lot more tutorials coming so be sure to subscribe to my RSS feed or follow me on Twitter. Also, if there are certain topics you would like me to write on, feel free to leave comments and let me know.
Source code for this part can be found here on GitHub.