![]()
In our previous article we learned how to easily add Algolia’s real time search to our web application. We kept it simple and showed the results in a functional but not very pretty result list.
In this article, we will see how to quickly and easily add some awesomesauce to our application by integrating our search results with Twitter’s typeahead.js. If you haven’t read the previous article, you will want to so you can create your Algolia account and initial data index which will be used in this article.
Initial code
To help start this tutorial, we will start with a basic application structure. Create the following directory structure and files.
1 2 3 4 5 6 | |
Add the following code to index.html, styles.css, and main.js.
1 2 3 4 5 6 7 8 9 10 11 12 13 14 15 16 | |
1 2 3 4 5 6 | |
1 2 3 4 | |
You will need to update the JavaScript file and set your own application id, search-only api key, and index name. These will be the same ones you used for the previous tutorial we did.
Algolia’s support for Twitter typeahead.js
One of the many nice things about Algolia’s APIs is the built in adapter for Twitter typeahead.js.
1 2 3 4 5 6 7 8 9 10 11 12 13 14 | |
This adapter makes it very simple to hook into typeahead.js functionality for building beautiful auto complete UI components. In essence it is building the necessary hooks to automatically initiate a search and return the results as a user types within the typeahead.js component.
Add typeahead.js to our application
In order to add typeahead.js to our application, we need to include the script. In the index.html file, add the following typeahead.js script tag just before the Algolia script tag.
1
| |
Now that we have the necessary scripts, we can tie the typeahead.js functionality with our Algolia search code. Update main.js to look like the following.
1 2 3 4 5 6 7 8 9 | |
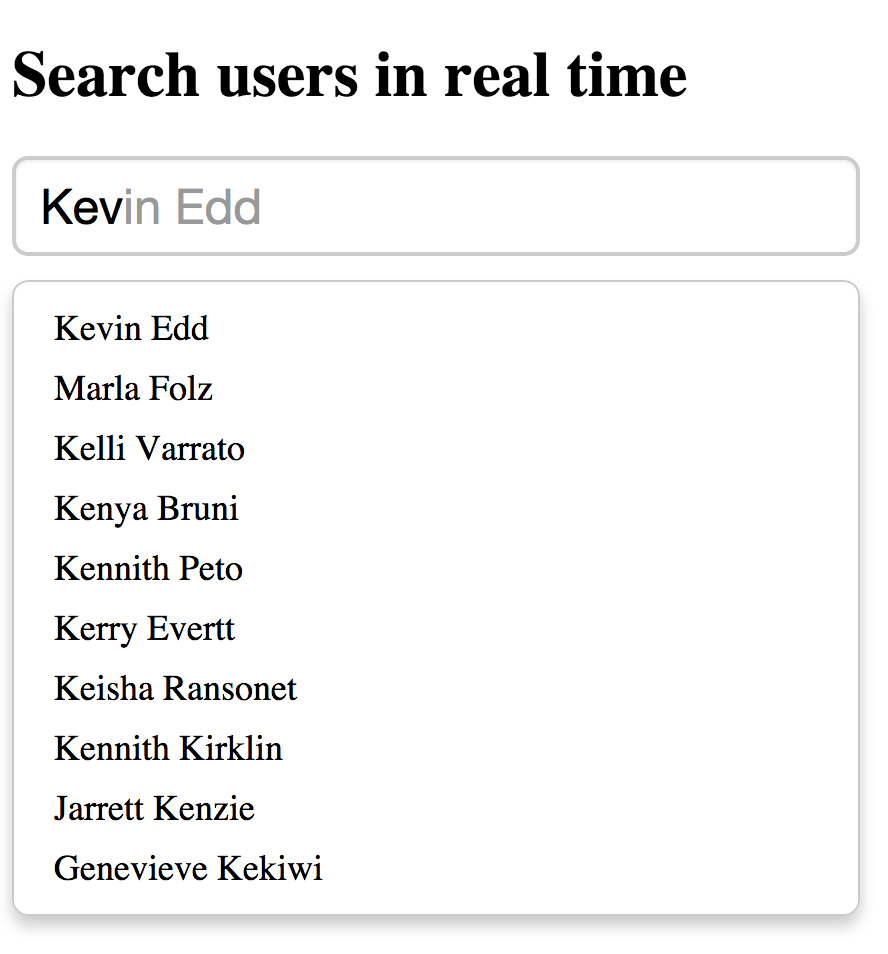
So that is all we need in order to have nice type ahead/auto complete functionality tied to our Algolia real time search. What is happening here is as we type in the input field, the typeahead component is firing off searches using the ttAdapter we hooked in as the source. As results come back, the typeahead component pulls out the name field from each hit and shows that in the dropdown.
Make it a little prettier
Some final touches will be to make the results look a little nicer with some CSS. Open up styles.css and update it to the following.
1 2 3 4 5 6 7 8 9 10 11 12 13 14 15 16 17 18 19 20 21 22 23 24 25 26 27 28 29 30 31 32 33 34 35 36 37 38 39 40 41 42 43 44 45 46 47 48 49 50 51 52 53 54 55 56 57 58 59 60 61 62 63 64 65 | |
Your results should look like this now if everything was done correctly.
Customize our typeahead.js options
There are three options we can control when setting up typeahead.js.
- highlight - If true, when suggestions are rendered, pattern matches for the current query in text nodes will be wrapped in a strong element with tt-highlight class. Defaults to false.
- hint - If false, the typeahead will not show a hint. Defaults to true.
- minLength - The minimum character length needed before suggestions start getting rendered. Defaults to 1.
Right now we are not supplying options when creating our typeahead object. Let’s change that by updating our code in main.js to look like this.
1 2 3 4 5 6 7 8 9 10 11 12 13 14 | |
What we have done is passed in an object with the options explicitly set to the defaults. This will give you and idea of what you can tweak and play with. As the code stands now, the application will behave the same. Feel free to try different settings out to see how they behave.
Enhancing our dataset
The second parameter to typeahead.js is an object that is a dataset. Datasets in typeahead.js have 4 fields that can be set.
- source – The backing data source for suggestions. Expected to be a function with the signature (query, cb). It is expected that the function will compute the suggestion set (i.e. an array of JavaScript objects) for query and then invoke cb with said set. cb can be invoked synchronously or asynchronously. A Bloodhound suggestion engine can be used here, to learn how, see Bloodhound Integration. Required.
- name – The name of the dataset. This will be appended to tt-dataset- to form the class name of the containing DOM element. Must only consist of underscores, dashes, letters (a-z), and numbers. Defaults to a random number.
- displayKey – For a given suggestion object, determines the string representation of it. This will be used when setting the value of the input control after a suggestion is selected. Can be either a key string or a function that transforms a suggestion object into a string. Defaults to value.
- templates – A hash of templates to be used when rendering the dataset. Note a precompiled template is a function that takes a JavaScript object as its first argument and returns a HTML string.
We have already used source and displayKey. We will now take advantage of templates to further enhance our application.
Typeahead.js templates
For our template, we will use Hogan.js. What we essentially need is a function that can take a JavaScript object and return an HTML string. Hogan will give us that functionality.
First thing we need to do is include Hogan.js in our application. Open up index.html and add the following script tag before the Algolia script tag.
1
| |
Next we will need to create our template for use by typeahead.js. Open up main.js and add the following code before the typeahead.js code.
1 2 3 4 5 6 7 8 | |
This template will serve to show our results by displaying the name along with a sub list of attributes that match out search criteria.
The final piece we need is to tell typeahead.js to use our template. Update the typeahead.js code like the following.
1 2 3 4 5 6 7 8 9 10 11 12 13 14 15 16 17 18 19 20 21 22 23 24 25 26 27 28 29 30 31 32 33 34 | |
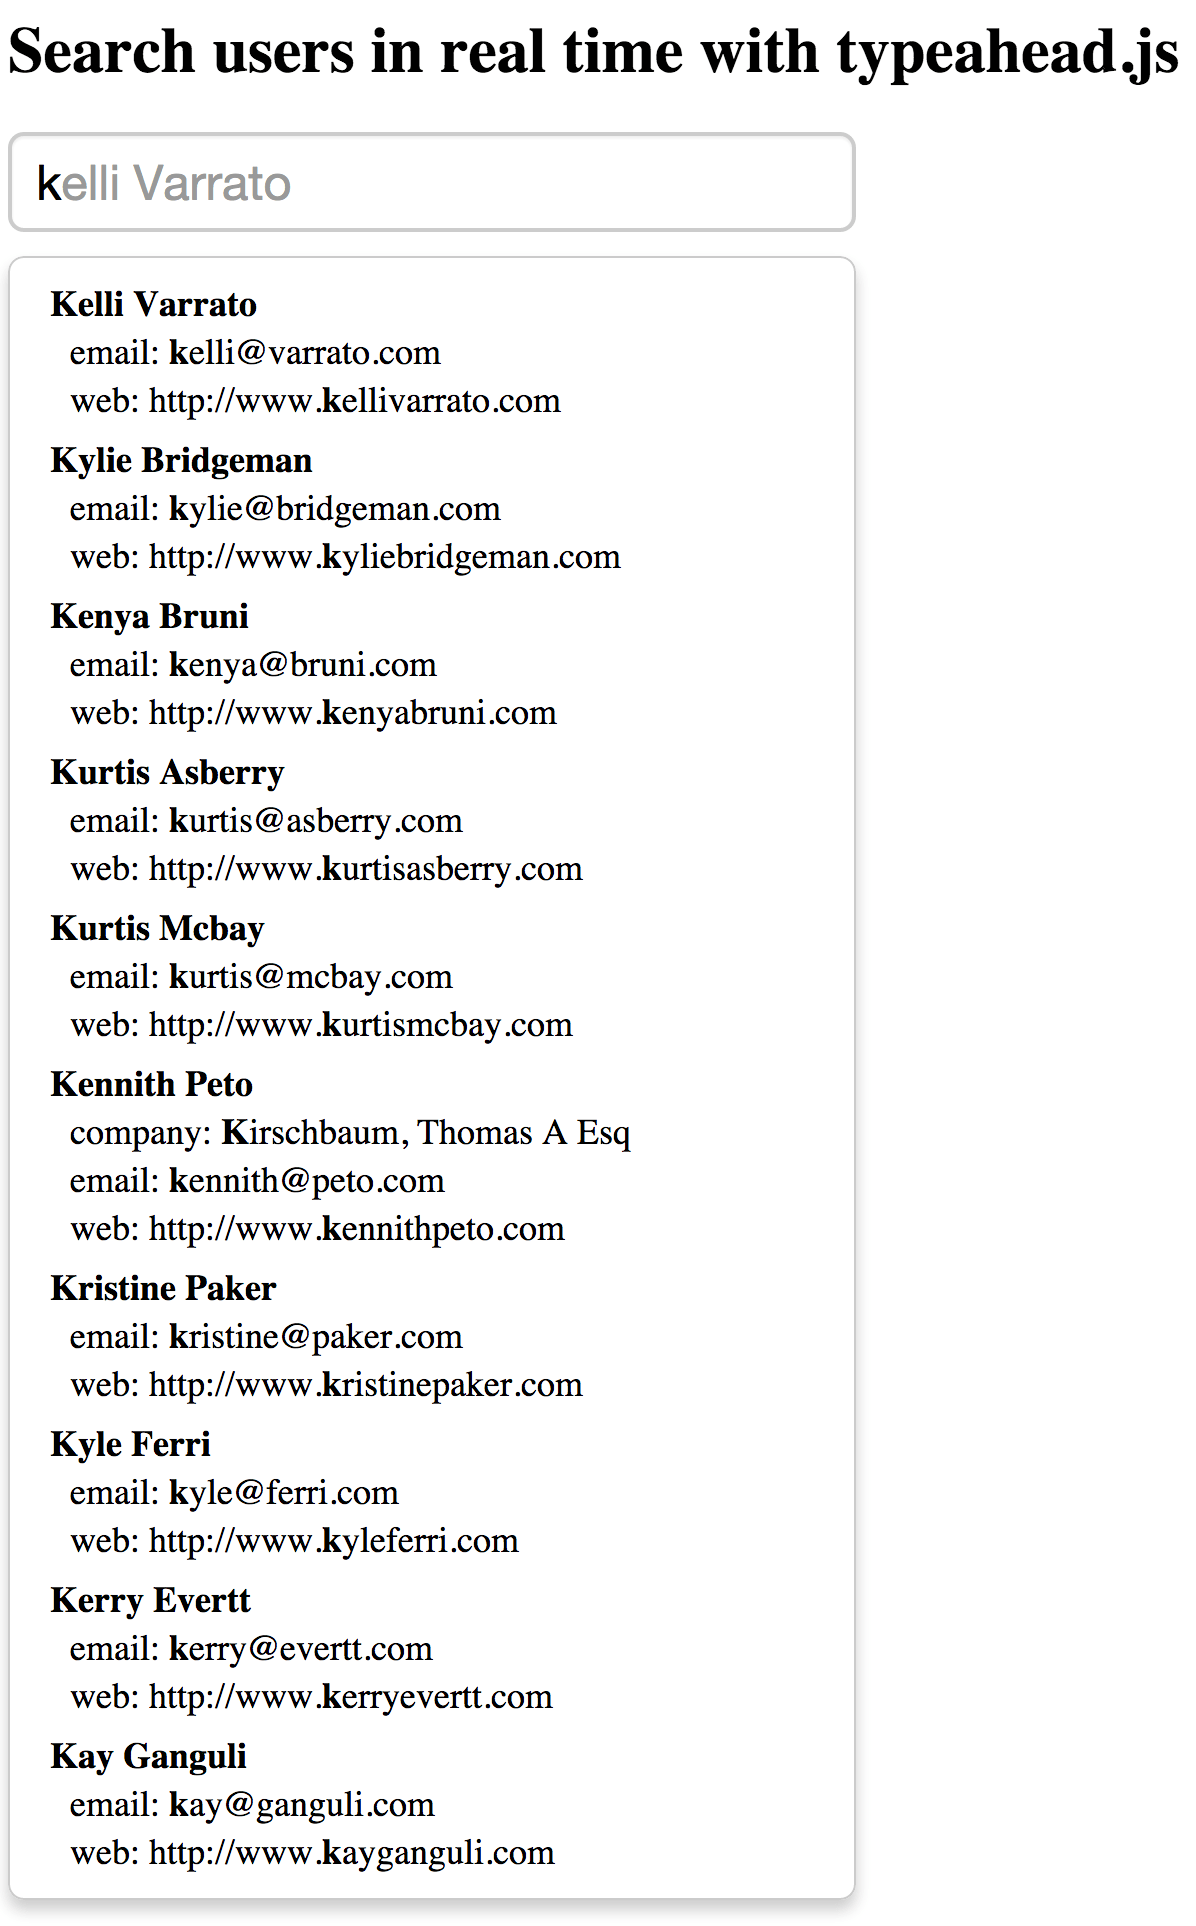
What we have done is defined what we want to show for the suggestion in the drop down by building our template. The really cool thing going on here is that we are taking advantage of the _highlightResult object for each of the hits provided by Algolia. For each of the highlighted results that have a match level not equal to none, we add it to our attributes object which will end up being shown as part of our template. Here is an example of a hit with the highlighted results. You will notice that email, web, and name have highlighted results when searching for the letter ‘k’.
1 2 3 4 5 6 7 8 9 10 11 12 13 14 15 16 17 18 19 20 21 22 23 24 25 26 27 28 29 30 31 32 33 34 35 | |
Final result
If everything is working properly, this is what your results should look like.
Wrap up
I absolutely love what Algolia is making for real time search. The ease of development is amazing and the speed of the search is unparalleled. Look forward to more articles as I dig deeper into the guts, options, and more on this fantastic developer service.